
Poolie Team: Oct 21, 2026
Imagine it’s April. You’re ready for a swim, and you drag that giant flamingo float out of the shed, only to find mold along the seam. The problem? It may not have been truly dry when you stored it. Not surface-dry. Completely dry. Moisture trapped in folds and around seams can encourage mold growth, especially in a damp garage or shed.
This guide gives you a clear, sequenced routine for poolside toy storage, covering how to clean, dry, and put everything away correctly so it’s still good when swim season comes back around.
The Golden Sequence: Why Your Pool Cleanout Order Matters
When it comes to toys and floats, a proper pool cleanout isn’t just a checklist. Each step prepares your gear for the next.
The wrong way: haul everything out of the water, shake off the obvious moisture, and toss it all into a bin. Done in ten minutes. Except come spring, you may find mold or damaged gear instead of swim-ready floats.
Follow these four steps before putting your gear away:
- Clean everything using a method suited to the material.
- Dry surfaces, folds, and valve areas thoroughly.
- Match your storage method to the type of item.
- Choose a dry, sheltered spot away from direct sunlight.
Rushing these steps can leave you with an unpleasant surprise months later. Pay particular attention to drying: the EPA explains that mold needs moisture to grow. A float folded while damp can trap that moisture until its next use.
Step 1: Rinse, Clean, and Inspect Everything
Pool toys and floats generally need to be clean and completely dry before long-term storage, but that does not mean every item needs to be disinfected. Start with the care instructions for the specific product.
Pool water, sunscreen, body oils, dirt, and other residue can remain on toys after use. Removing that buildup before storage helps keep the gear cleaner and gives you a chance to spot damage before it is packed away.
Before you start, sort the gear into inflatables, hard plastic toys, foam items, and anything with a fabric cover. Don’t assume the same cleaning method works for every material. Check whether covers can be removed and washed separately, and set aside anything with unclear care instructions until you can check the manufacturer’s guidance.
Give each item a quick inspection, too. Look for split seams, damaged valves, loose parts, or foam that’s breaking apart. Put anything needing repair in a separate pile so it doesn’t get packed with gear that’s ready to use. This also helps you avoid spending time cleaning an item that needs replacing.
First, rinse away pool water, dirt, and loose debris with fresh water. For routine cleaning, use the cleaner and method recommended by the manufacturer. For many hard, nonporous plastic items, mild detergent and water are a reasonable starting point.
The EPA’s mold-cleanup guidance recommends scrubbing mold from hard surfaces with detergent and water and then drying them completely. EPA does not recommend chlorine bleach as a routine mold-cleanup practice.
Do not assume household vinegar or a homemade bleach mixture is safe for every float, foam toy, printed surface, adhesive, or fabric. Those products can affect colors, coatings, seams, or other materials. If a manufacturer specifically approves a disinfectant, follow its dilution, contact-time, rinsing, and ventilation instructions. Never mix bleach with ammonia or other cleaners.
Use a soft cloth or nonabrasive brush where appropriate, paying attention to seams, handles, textured areas, and the outside of valve assemblies. Rinse away cleaning-product residue as directed and move on to drying.
Step 2: How to Ensure Your Inflatables Are 100% Dry
Drying is easy to rush. You wipe your float down, and it looks ready—but folds, seams, and valve areas can still hold water. Spread the material out and check these spots for droplets or dampness. Blot them with a clean, dry towel, then allow more drying time if needed. A surface feeling cool doesn’t prove it’s wet, so don’t rely on touch alone.
Use these two drying steps together:
Dry Out on Towels
Using towels is an easy way to get started when drying out your toys. Wipe down all flat surfaces with a towel to absorb as much water as possible. After you have gone over your items with a towel, you can move on to allowing them to air dry. Make sure that your items aren’t sitting flat on the ground. You don’t want the bottom of your toys collecting more water.
Air Dry in the Shade
When learning how to properly store your pool floats, it’s best to dry them out in the shade. You know that Texas gets very hot, but too much sun can damage your pool toys as well. Research published in Photochemical & Photobiological Sciences confirms that UV-B radiation can contribute significantly to the degradation of plastics and other outdoor materials. The rate of damage depends on the plastic, stabilizers, coatings, temperature, and amount of solar exposure.
Rather than using a fixed two-hour drying rule, give each item as long as it needs to become completely dry. Drying time changes with humidity, airflow, temperature, material thickness, folds, seams, and valve design. Before storage, inspect both sides of the item and any areas where water can become trapped.
Step 3: How to Store Pool Floats for Winter
Once everything is clean and completely dry, you’re ready to protect your gear through the winter. The best way to store pool floats depends on their material and design. Inflatables, foam noodles, and hard plastic toys may need different approaches.
Lidded Plastic Bins for Dry Inflatables
Deflate your dry inflatables according to the manufacturer’s instructions. Use a compatible pump’s deflation setting only if recommended. Gently roll or fold the material as directed, avoiding sharp creases and tight compression. Store the floats in a clean, dry bin with a secure lid, without overpacking it. Never seal damp items inside.
If you use a sealed bin, check it occasionally for trapped condensation or moisture. A lid helps keep out dust and pests, but it can also trap moisture if an item was not completely dry when it went in.
Mesh Baskets
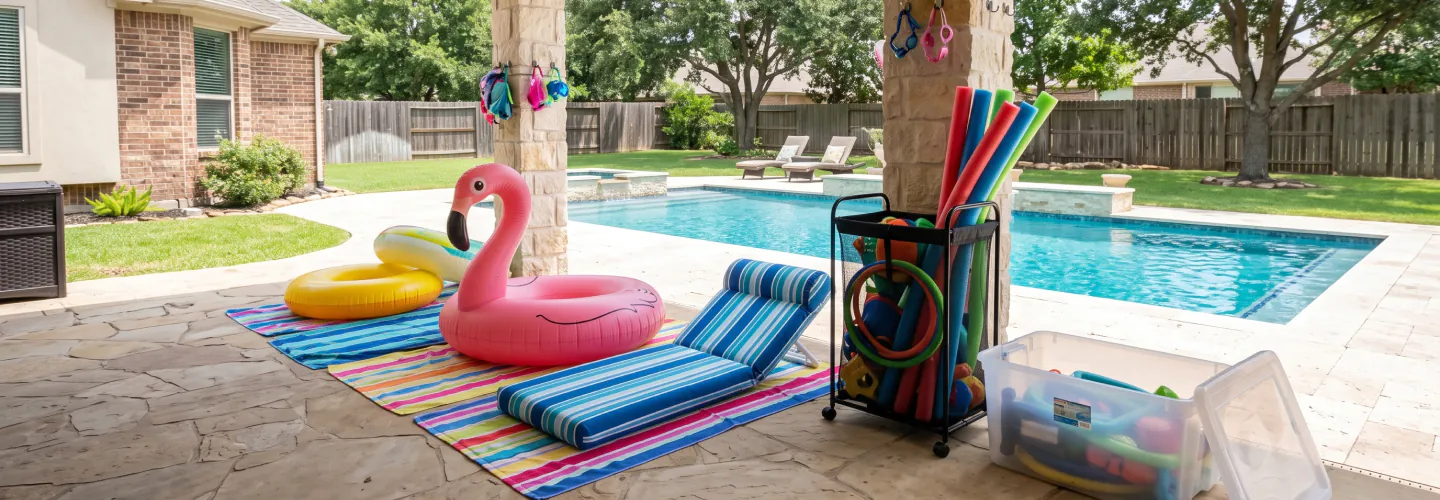
Mesh baskets or rolling carts can keep suitable toys, such as dive rings and pool noodles, organized while allowing airflow. Dry everything before storage, even when using an open container. Keep baskets inside a dry, sheltered storage area, away from direct sunlight and places where rain can blow in.
Step 4: Choose a Storage Spot You Can Check
A good container is only part of poolside toy storage. Where you put it matters, too. Choose a sheltered spot that stays dry, falls within the manufacturer’s storage temperature range, and leaves enough room to retrieve items without dragging them past sharp tools or rough edges.
Before moving everything in, check for roof leaks, damp flooring, and rain entering around doors. If the space regularly gets wet, choose another location rather than relying on a tightly closed bin to solve the problem. Keep toys separate from pool chemicals and follow the chemicals’ storage instructions.
Label each container so you know what’s inside without unpacking it. Keep repair supplies and care instructions easy to find, and avoid squeezing one last float into an already full bin. Leave baskets accessible so you can inspect their contents without moving heavy equipment.
Don’t forget the gear until spring. Check it periodically through winter, especially after a leak or wind-driven rain reaches the storage area. Look for condensation inside bins, damp surfaces, musty odors, and signs of pests. If anything is damp, unpack it, address the moisture source, and clean and dry affected items before storing them again.
3 Common Pool Float Storage Mistakes to Avoid
Before putting everything away, check for these three storage mistakes.
Ignoring the Float’s Storage Instructions
For inflatables designed to be deflated between seasons, release the air before packing them away. Follow the manufacturer’s folding or rolling instructions, and avoid forcing the float into a container that’s too small.
Storing Toys with Dirt and Residue
Don’t pack toys away with dirt, sunscreen, or body oils still on them. Wash off the residue before drying. Check the storage area for pest access, too. Cool-weather storage spaces such as garages and sheds can also provide shelter for rodents and other pests. Keep food and pet food secured nearby, close obvious entry points where practical, and inspect stored gear for signs of chewing or nesting.
Stacking Heavy Gear on Pool Storage Bins
Heavy tools, holiday boxes, and car tires can crush or deform storage bins and the gear inside. Keep pool toys in a designated spot, avoid overpacking, and follow the container’s stacking limits.
Frequently Asked Questions About Poolside Toy Storage
1) Can I leave pool floats outside in the winter?
It’s better to store them in a dry, sheltered location within the manufacturer’s recommended temperature range. Outdoor exposure can leave floats vulnerable to sunlight, moisture, and temperature extremes. Whether cold temperatures will damage a particular float depends on its materials and the manufacturer’s storage requirements. Clean and dry them before putting them away.
2) How do you get black mold off plastic pool toys?
For accessible mold on hard, nonporous plastic, follow the manufacturer’s cleaning instructions. Use a soft cloth or nonabrasive brush with a suitable cleaner, then rinse and dry thoroughly. Replace toys with mold inside areas you can’t fully clean and dry. Don’t assume dark-colored mold is a particular species.
EPA guidance for hard, nonporous surfaces generally emphasizes detergent, physical cleaning, and complete drying rather than trying to identify or “kill” the mold with a household remedy. EPA also notes that bleach is not recommended as a routine mold-cleanup practice.
3) Should I deflate pool floats before storing them?
For most inflatable floats, yes. Follow the manufacturer’s storage instructions. Deflating saves space and makes packing easier. Dry the float thoroughly first, then roll or fold it gently without forcing sharp creases.
If the manufacturer recommends storing a particular product inflated or partially inflated, follow those instructions instead.
4) Can I store pool toys in the garage or shed?
Yes, if the space stays dry and the toys can be kept within the storage conditions recommended by their manufacturers. Before choosing a garage or shed, check for leaks, condensation, excessive heat, pest access, and direct sunlight.
The container cannot compensate for a chronically damp storage area. EPA emphasizes moisture control as the key to preventing mold growth, so fixing the moisture source matters more than simply sealing damp gear inside a bin.
Before the first swim next season: Unpack your toys and floats somewhere clean and dry, where you can inspect each item before it goes near the water. Check for mold, trapped water, damaged seams, loose parts, or signs of chewing. Clean everything according to its care instructions, and replace anything you can’t fully clean or use safely.
Inflate floats according to their instructions and check that the valves close properly and the floats hold air before use. Don’t take them straight from the storage bin into the pool.
Rinse away cleaning-product residue as directed before returning toys to the water. If you find moisture or mold, inspect the container and storage spot as well. Addressing the source now can help you avoid the same unpleasant surprise next season.
Wrap Up Your Autumn Cleanout: Smart Storage for a Brighter Spring
A solid autumn routine for your poolside toy storage can help your floats and gear last longer. Give yourself enough time for cleaning, and allow drying to take as long as it needs. Clean it, dry it completely, store it right for the type of item it is, and protect it from humidity and pests over the winter.
While you’re handling the toys and floats, Poolie’s professional team can help with seasonal pool equipment care and chemical balancing. Fill out the form below to discuss what your pool needs through the cooler months.


